Navisworks now has a Glue-it button add-in that allows you to publish data directly from Navis on to the cloud. I've added the link to download the add-in, which is compatible with 2012 and 2013 Navisworks.
https://bim360.autodesk.com/addins/addins.html
Tuesday 9 October 2012
BIM 360 Glue App!!!
The long awaited ipad app for Glue has finally been released! Here's a few screen shots....


Secure user log-in - with real-time access to all the projects the user has access to on the desktop

Access to all the views set up on your desktop, as well as being able to click and view object properties.

The ability to walk through models and be able to look around models using the ipads gyroscope.
This app is a great way to allow multiple users to look around a project in meeting rooms and on site.
Wednesday 3 October 2012
Working with colors and transparency in BIM 360 Glue
A big thank you to the bloggers over in Germany for this one....
I saw that a frequent question from the users is the ability to change the appearance of objects (color, transparency etc.) inside BIM360 Glue.
There is a way to paint objects inside Glue by using Model Variations.1. First open the Review menu and go the Variations tab on the right side of the UI.
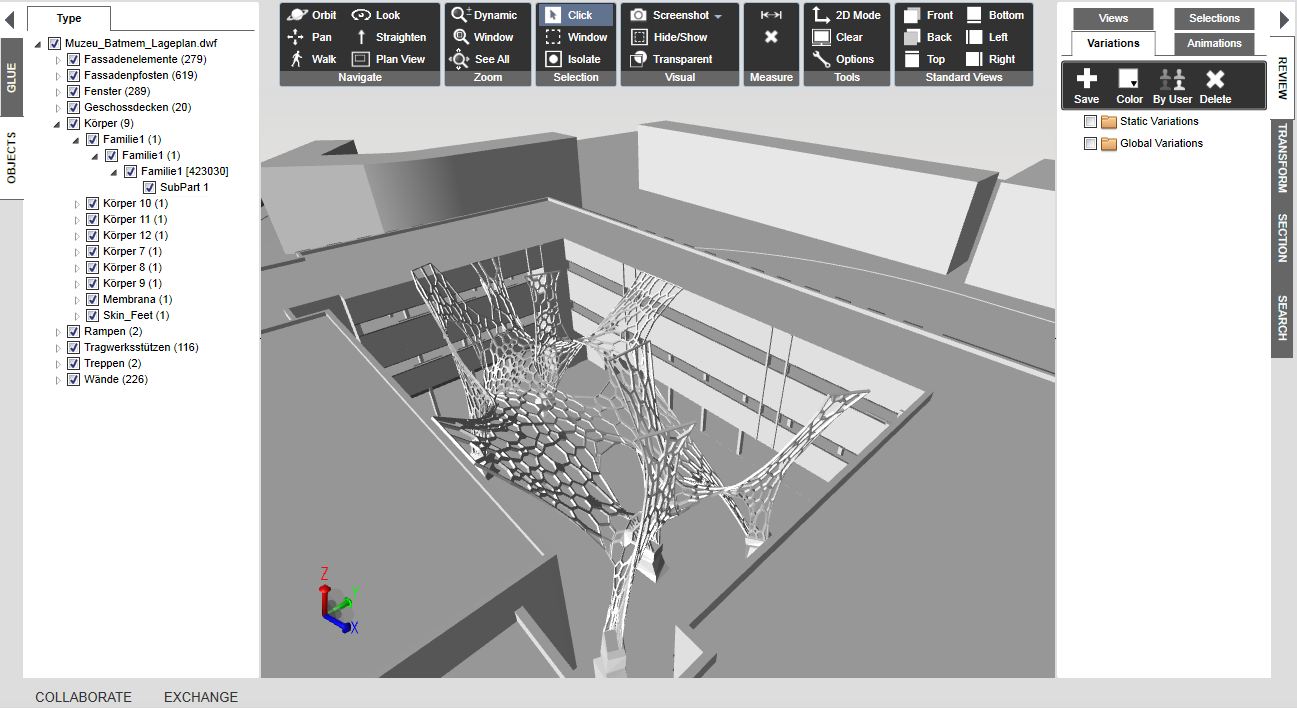
2. Then select some objects with the Selection Tool , Window Selection Tool or from the Object menu on the left of the UI.

3. From the Color drop-down menu, select a color. The color is automatically applied to the selected element.

Using transparency
Transparency can be used through the Isolate tool.
First we need to select an object and then click Isolate , on the Selection panel.
In the Options menu, we can control the transparency of elements.


Click Isolate again to reveal all elements in the 3D Model Viewer.
With the Hide/Show and the Transparent tool located on the Visual panel, we can hide and show different objects or selections
Subscribe to:
Posts (Atom)